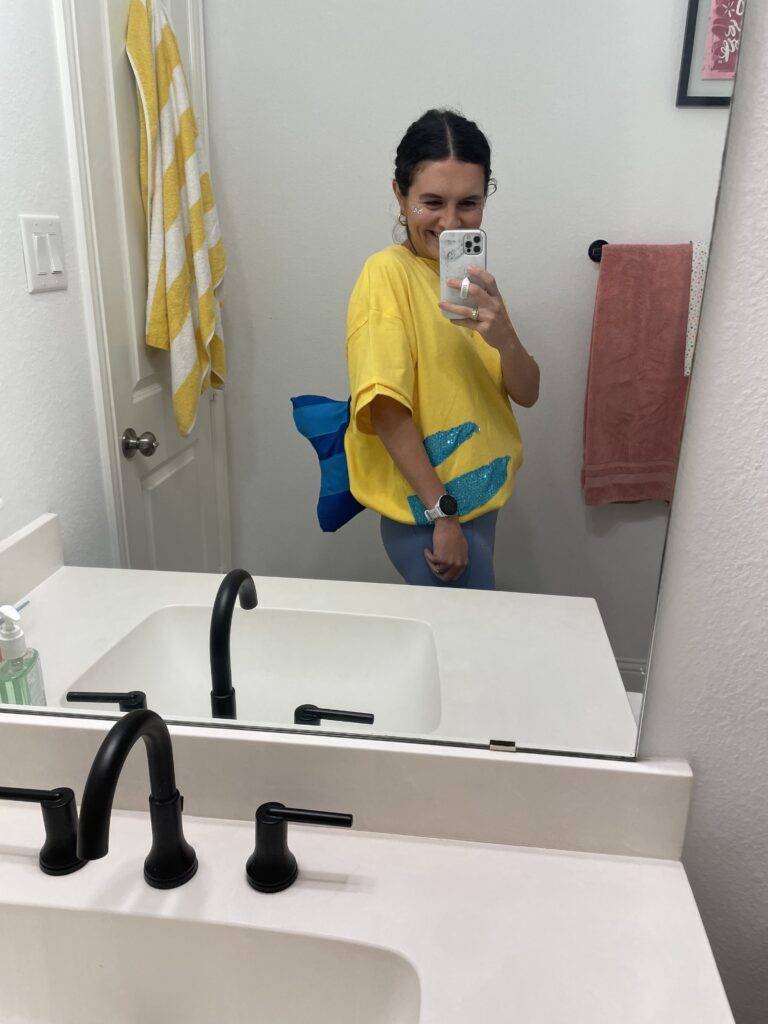
This Halloween, four hours before a costume party, I decided that I was going to sew my first ever costume. What on earth gave me the idea that I could do this when I have never in my life sewn a costume? Who knows. My kids were Ariel and Sebastian, and my daughter proclaimed I had to be Flounder. At least it wasn’t Ursula? With only a few hours, I set out to make the best Flounder costume I could. This was my Flounder costume inspiration.
Materials for DIY Flounder Costume
Here’s what I bought at the store (Spent $27, but ended up with extra fabric and also bought some red fabric for a sash for my husband’s DIY Prince Eric getup)
- Oversized yellow t-shirt (got mine for a few bucks at Hobby Lobby but here’s an Amazon option)
- Sparkly teal fabric (1 yard)
- Dark blue cotton fabric (1 yard)
- Teal cotton fabric (1 yard)
- If you’re doing a no-sew option, you’ll need fabric glue
Other materials I salvaged from around the house:
- Cardboard (to make a core to make the fin stay up and not flop to the side. You’ll see pics below.)
- Stuffing from inside an old comforter (to give some thickness to the fin). You could open up an old throw pillow or buy actual stuffing.
- Duct tape (for assembly of the core of the fin)
- Face glitter (because why not- fish are shiny right? Blue glitter might look cool, but I just had silver)
- Light blue leggings and plain white converse for the rest of the costume
With more time I would have ordered an oversized yellow hoodie instead of a yellow tshirt as my base, that way I could have added fins to the top of the hood. Flounder has a distinct little fin on his head that I wish I could have created. Alternatively could have tested adding a head fin to a black headband.
I should have glued some parts to make it go quicker since I was in a time crunch. I only had white thread on hand, but this would look better with blue thread.
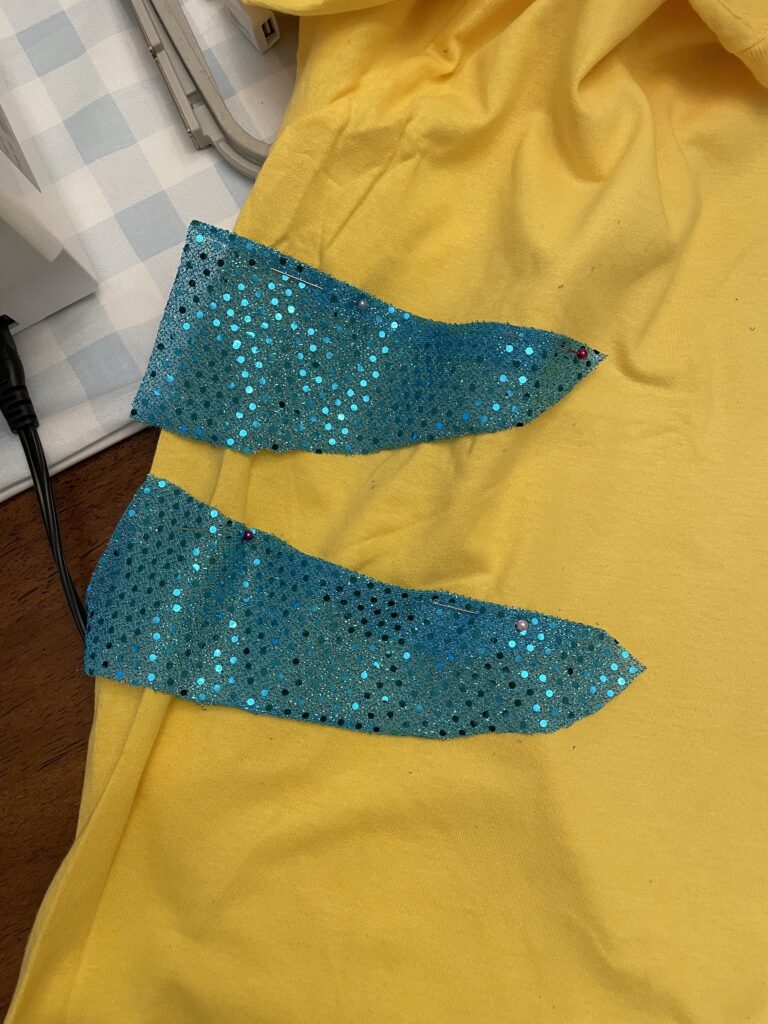
Part 1: Side Stripes
This first part is the easiest part of the project. I used sparkly teal fabric to cut out Flounder’s stripes, but you could easily just use plain fabric. I thought the sparkle gave it some pizzazz. One stripe is a little longer on each side. Simply cut them out, pin them in place (for sewing) or just glue ’em on if you’re doing the no sew option.
Also, I had my stripes end at the side seam of the shirt, but looking back I wish I had taken them all the way around the back to meet the fin.
Part 2: Flounder’s Fin
This part of the project took the longest, but hopefully my trial and error/learnings can help it go quicker for you. I wanted to add a fin but wanted to make sure it stuck out and didn’t fall flat against my back. With my husband’s help, we got the idea to build a cardboard “core” for the fin that would keep it up. We used what cardboard we could salvage from the garage, and wrapped it all together in duct tape since it would be covered in fabric anyway.
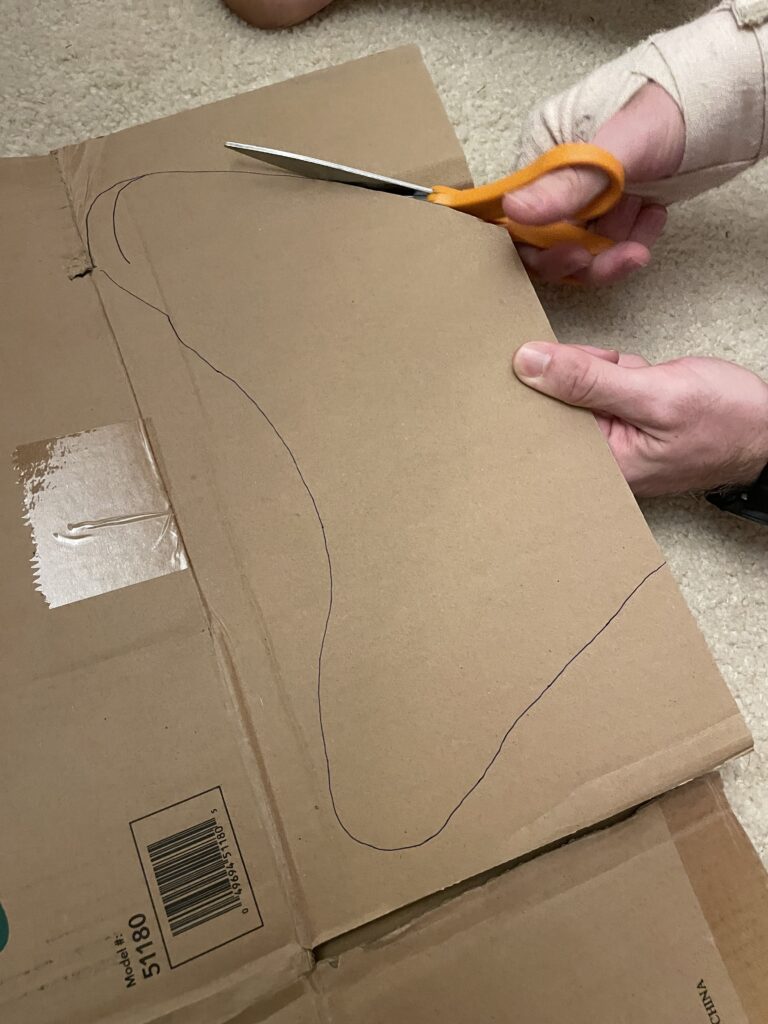
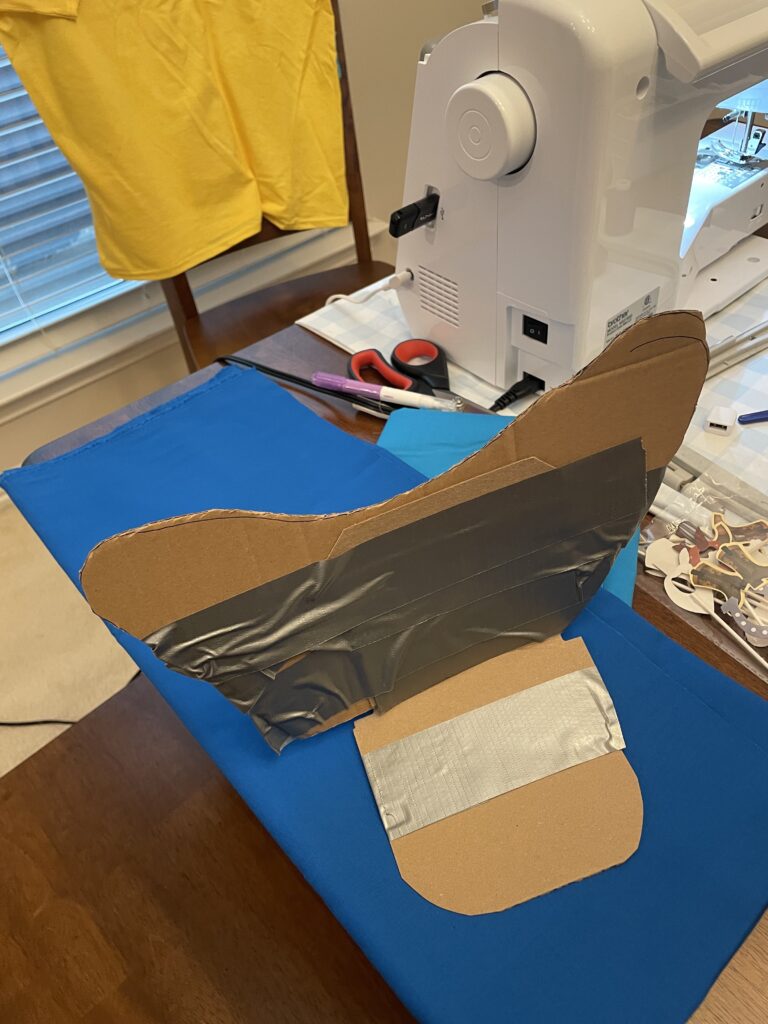
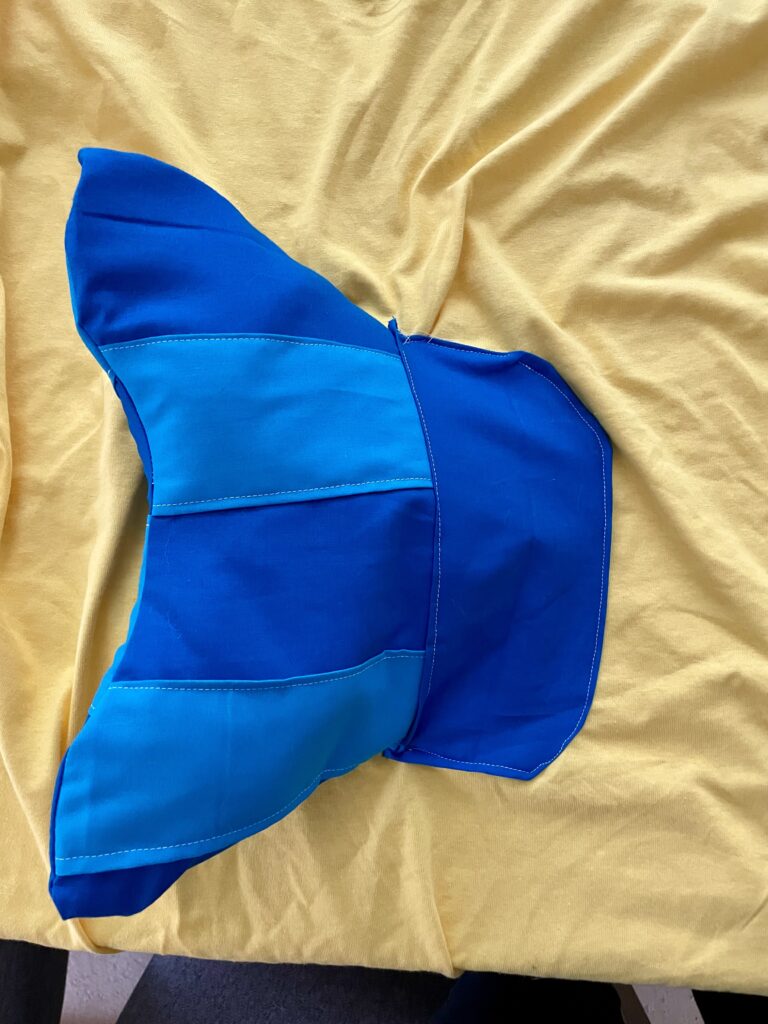
The two pieces of cardboard that flare out on either side are what make the fin stay “up” on my back. I simply sewed blue fabric over those to attach it to the shirt and it looked just fine.
Once the core was done, it was time to make the sleeve that would go over the fin and side panels. I used the cardboard fin as a guide to trace the fabric, giving it about an extra inch of fabric around the fin to account for the seam. Then, I added the lighter teal stripes. I wish I had done fabric glue for the stripes, as sewing them was a pain.
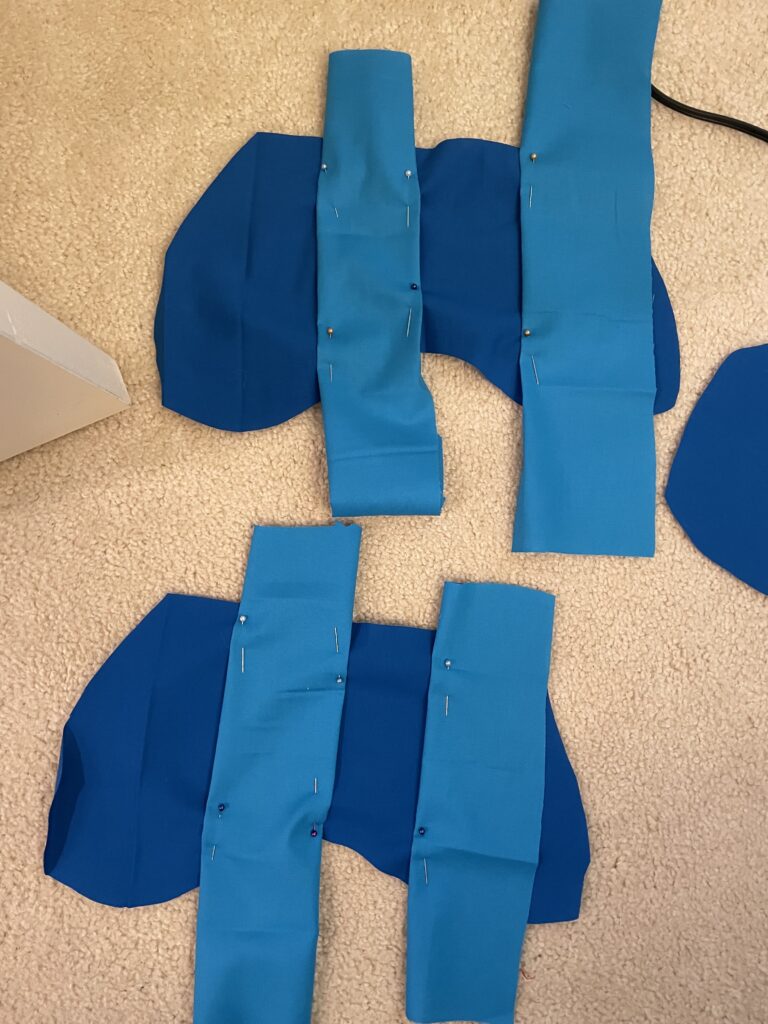
Once the stripes were sewn on, I took each fin and sandwiched them together so that the stripes were on the inside. I sewed all three sides of it and flipped it inside out. At this point I added the two pieces that would cover the cardboard that flared out, too. You can see them in the final fin photo below.
Once the entire fin sleeve was made, I slid it over the cardboard core. I did have to fold the cardboard fin a bit to get it inside the fabric.
Lastly, we stuffed some stuffing from an old comforter on either side of the cardboard core to give it some fluff, and it was ready to be attached to the shirt. I wished I had taken some photos sewing it onto the shirt, but I didn’t snap any. You can look at the pic of the final product and get an idea for how it was done:
All in all, it took about 2-3 hours to to this because there was a lot of trial and error. Plus I’m still a newbie with sewing. If you want a professional top notch costume, this may not be your style, but Flounder is a distinct enough character that if you get the colors right and the stripes, people know what you are pretty quickly 😉
Good luck!

Leave a Reply